Suzuki outboard motors 1988 2003 repair manual., Page 362Get this manual
11-10 HAND REWIND STARTER The starter drum spring is under high tensionIf the spring should come loose, it may cause serious damage or personal injuryTake all applicable cautions when working with this spring7Carefully remove the coil spring from the starter caseCLEANINGINSPECTION
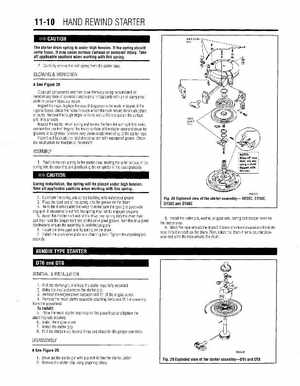
See Figure 28
Clean all components and then blow them dry using compressed airRemove any trace of corrosion and wipe all metal parts with an oil dampened cloth to prevent future corrosionInspect the ropeReplace the rope if it appears to be weak or frayedIf the rope is frayed, check the holes through which the rope passes for rough edges or burrsRemove the rough edges or burrs with file and polish the surface until it is smoothInspect the starter return spring end hooksReplace the spring if it is weak, corroded or crackedInspect the inside surface of the starter case and drum for grooves or roughnessGrooves may cause erratic rewinding of the starter ropeInspect and lubricate the ratchet mechanism with waterproof greaseCheck the mechanism for freedom of movementASSEMBLY
1Position the coil spring in the starter case, feeding the outer portion of the spring into the case first and positioning the remainder in the case graduallyDuring installation, the spring will be placed under high tensionTake all annlicable cautions when workinn with this snrino 0500AG25
2Lubricate the spring and center bushing with waterproof grease3Place the bent end of the spring into the groove on the drum4Twist the drum counterclockwise to make sure the spring is positively engagedIf resistance is not felt, the spring may not be engaged properly5Insert the shorter bent end of the drive pawl spring into the drum hole and then hook the longer bent end on the drive pawl grooveTurn the drive pawl clockwise to ensure the assembly is installed properly6Install the drive pawl and its spring on the drum7Install the drum drive plate and attaching boltTighten the attaching bolt securelyFig28 Exploded view of the starter assembly-