Suzuki outboard motors 1988 2003 repair manual., Page 320Get this manual
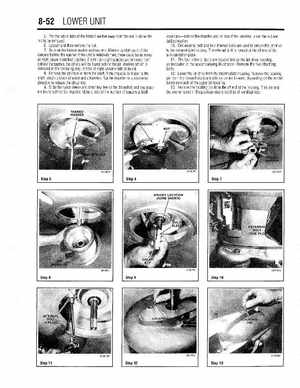
8-52 LOWER UNIT 5Pry the tab or tabs of the tabbed washer away from the nut to allow the nut to be removed6Loosen and then remove the nut7Remove the tabbed washer and spacersMake careful count of the spacers behind the washerIf the unit is relatively new, there could be as many as eight spacers stacked togetherIf less than eight spacers are removed from behind the washer, the others will be found behind the jet impeller, which is removed in the following stepA total of eight spacers will be found8 Remove the jet impeller from the shaftIf the impeller is frozen to the shaft, obtain block of wood and hammerTap the impeller in clockwise direction to release the shear key9Slide the nylon sleeve and shear key free of the driveshaft and any spacers found behind the impellerMake note of the number of spacers at both locations-behind the impeller and on top of the impeller, under the nut and tabbed washer10One external bolt and four internal bolts are used to secure the jet drive to the intermediate housingThe external bolt is located at the aft end of the anti-cavitation plate11The four internal bolts are located inside the jet drive housing, as indicated in the accompanying illustrationRemove the five attaching bolts12Lower the jet drive from the intermediate housingRemove the locating pin from the forward starboard side (or center forward, depending on the model being serviced) of the upper jet housing13Remove the locating pin from the aft end of the housingThis pin and the one removed in the previous step should be of identical size04700P6T