Suzuki outboard motors 1988 2003 repair manual., Page 222Get this manual
7-10 POWERHEAD 13wires1415161718Remove the wiring harness stopper and disconnect the ignition coil lead Remove the CDI unit and the wiring harness assemblyRemove the silencer cover, Disconnect the choke leverRemove the bolts holding the powerhead to the driveshaft housingRemove the powerhead21Remove the bolts holding the powerhead to the driveshaft housing22Remove the powerhead If the powerhead will not come off, rotate the propeller to free the powerhead from the driveshaft¥¥ powerhead will not come off, rotate the propeller to free the the powerhead from the driveshaft19Remove and discard the powerhead mounting gasketTo install: 20Clean the powerhead mounting and driveshaft housing gasket surfaces thoroughly21Lightly coat the driveshaft splines with marine grease22Install new powerhead new mounting gasket23Install the powerhead, rotating the propeller as required to align driveshaft and crankshaft splines24Coat powerhead mounting bolt threads with silicone sealer25Install the powerhead mounting bolts and tighten to specification26Connect the choke lever27Install the silencer cover28Install the CDI unit and the wiring harness assembly29Install the wiring harness stopper and connect the ignition coil lead wires30Connect the fuel hose to the engine under cover31Connect the throttle valve sensor, choke solenoid and idle speed adjustment switch electrical leads32Install the oil tank33Connect the oil hose to the oil tank34Install the electric parts holder35Install the CDI unit from the electric parts holder36Connect the spark plug leads37Connect the battery cables, positive side first38Connect the starter cable to the neutral start leverAdjust to specification 39Install the electric parts holder and rectifier cover40Install the recoil starter41Start the engine and make adjustments as necessary42Check engine for proper operation43Install the engine cover DT35 and DT40
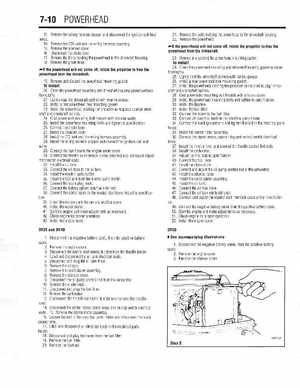
23Remove and discard the powerhead mounting gasketTo install: 24Clean the powerhead mounting and driveshaft housing gasket surfaces thoroughly25Lightly coat the driveshaft splines with marine grease26Install new powerhead new mounting gasket27Install the powerhead, rotating the propeller as required to align driveshaft and crankshaft splines28Coat powerhead mounting bolt threads with silicone sealer29Install the powerhead mounting bolts and tighten to specification30Install the flywheel31Install the fuel filter32Connect the hoses to the fuel filter33Connect all electrical leads in the electrical parts holder34Connect the black ground wire and tighten the bolt in the electrical parts holder35Install the starter motor assembly36Connect the starter motor, starter relay and neutral switch electrical leads37Install the throttle lever and connect the throttle control link rods38Install the carburetor39Adjust the link rods to specification 40Connect the fuel lines 41Install the choke knob42Connect and adjust the oil pump control rod at the carburetor43Install the silencer cover44Install the recoil starter assembly45Install the oil tank46Connect the oil tank hose47Connect the oil tank electrical leads48Connect and adjust the neutral start interlock cable at the throttle limiter49Connect the negative battery cable, then the positive battery cable50Start the engine and make adjustments as necessary51Check engine for proper operation52Install the engine cover1Disconnect the negative battery cable, then the positive battery cable2Remove the engine cover3Disconnect the neutral start interlock cable from the throttle limiter4Label and disconnect the oil tank electrical leads5Disconnect and plug the oil tank hose6Remove the oil tank7Remove the recoil starter assembly8Remove the silencer cover9Disconnect the oil pump control rod from the carburetor10Remove the choke knob11Disconnect and plug the fuel lines 12Remove the carburetor13Disconnect the throttle control link rods and remove the throttle lever14Disconnect the starter motor, starter relay and neutral switch electrical leads15Remove the starter motor assembly16Loosen the bolt in the electrical parts holder and disconnect the black ground wire17Label and disconnect all electrical leads in the electrical parts holder18Disconnect and plug the hoses from the fuel filter19Remove the fuel filter20Remove the flywheelISee accompanying illustrations