Johnson Evinrude Outboard Motors 1956-1970 1.5-40hp repair manual., Page 232Get this manual
ELECTRICAL motorNEVER make the momemtary contact with the positive lead to the terminal, because any arcing at the terminal may damage the terminal threads and the nut may not take to the damaged threadsThe motor should turn rapidlyIf the starter motor fails to rotate, the starter motor must be disassembled again and the service work carefully checkedSorry about that, but some phase of the rebuild task was not performed properly
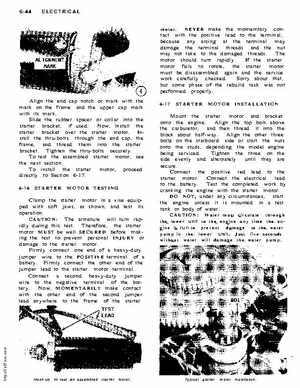
Align the end cap notch or mark with the mark on the frame and the upper cap mark with its markSlide the rubber spacer or collar into the starter bracket, if usedNow, install the starter bracket over the starter motorInstall the thru-bolts through the end cap, the frame, and thread them into the starter bracketTighten the thru-bolts securelyTo test the assembled starter motor, see the next sectionTo install the starter motor, proceed directly to Section 6-176-16 STARTER MOTOR TESTING Clamp the starter motor in vise equipped with soft jaws, as shown, and test its operationCAUTION: The armature will turn rapidly during this testTherefore, the starter motor MUST be well SECURED before making the test to prevent personal INJURY or damage to the starter motorFirmly connect one end of heavy-duty jumper wire to the POSITIVE terminal of batteryFirmly connect the other end of the jumper lead to the starter motor terminalConnect second heavy-duty jumper wire to the negative terminal of the batteryNow, MOMENTARILY make contact with the other end of the second jumper lead anywhere to the frame of the starter