1999 "EE" 90, 115 FFI, 150, 175 V4, V6 FFI Outboards Service Manual, P/N 787024, Page 43Get this manual
4To adjust, disconnect the sensor 2-pin connectorLoosen the two sensor clamp screwsRotate sensor until 0.0450.055 in(1,11,4 mm) gap is achieved5Hold sensor in position and tighten clamp screws and secure connector
Timing Pointer Verification
INote There are points on the pointerThe V4 is markedThe
other is for V61Remove spark pi ugs from all cyl nders and rotate the flywheel clockwise to 30 ATOC[] 2Install OMC Piston Stop, PIN 342679, into No.1 cylinder spark plug hole
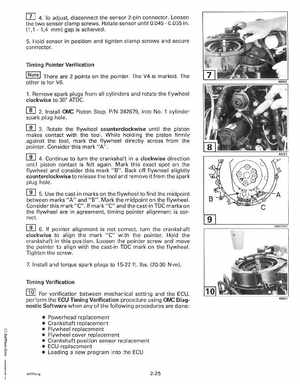
3Rotate the flywheel counterclockwise until the piston makes contact with the toolWhile holding the piston firmly against the tool, mark the flywheel directly across from the pointerConsider this mark "A"
4Continue to turn the crankshaft in clockwise direction until piston contact is felt againMark this exact spot on the flywheel and consider this mark "B"Back off flywheel slightly counterclockwise to release the tool and remove it from the spark plug hole
5Use the cast-in marks on the flywheel to find the midpoint between marks "A" and "B"Mark the midpoint on the flywheelConsider this mark "C"If mark "c" and the cast-in TOC marks on the flywheel are in agreement, timing pointer alignment is correctDRC7727