1996 Johnson Evinrude "ED" 90 CV 88 thru 115 Service Manual, P/N 507126, Page 217Get this manual
Installation
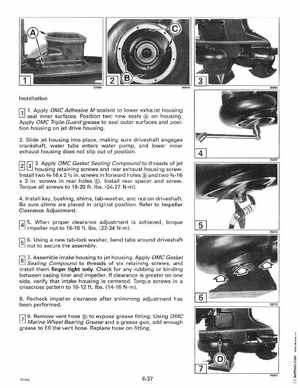
1111Apply OMC Adhesive sealant to lower exhaust housing
seal inner surfacesPosition two new seals on housingApply OMC Triple-Guard grease to seal outer surfaces and position housing on jet drive housing2Slide jet housing into place, making sure driveshaft engages crankshaft, water tube enters water pump, and lower inner exhaust housing does not slip out of position
f313Apply OMC Gasket Sealing Compound to threads of jet housing retaining screws and rear exhaust housing screwInstall two 38-16 '2 inscrews in forward holes and two 38-16 inscrews in rear holes Install rear spacer and screwTorque all screws to 18-20 ftIbs(24-27 Nm)4Install key, bushing, shims, tab-washer, and nut on driveshaftBe sure shims are placed in original positionRefer to Impeller Clearance Adjustmentf41 5When proper clearance adjustment is achieved, torque impeller nut to 16-18 ftIbs(22-24 Nm)1sl 6Using new tab-lock washer, bend tabs around driveshaft nut to secure the assemblyf61 7Assemble intake housing to jet housingApply OMC Gasket Sealing Compound to threads of six retaining screws, and install them finger tight onlyCheck for any rubbing or binding between casing liner and impellerIf clearance is greater on one side, verify that intake housing is centeredTorque screws in crisscross pattern to 10-12 ftIbs(14-16 Nm)8Recheck impeller clearance after shimming adjustment has been performedf71 9Remove vent hose to expose grease fittingUsing OMC Marine Wheel Bearing Grease and grease gun, add enough grease to fill the vent hoseReplace hose on fitting