1996 Johnson Evinrude "ED" 40 thru 55 2-Cylinder Service Manual, P/N 507124, Page 92Get this manual
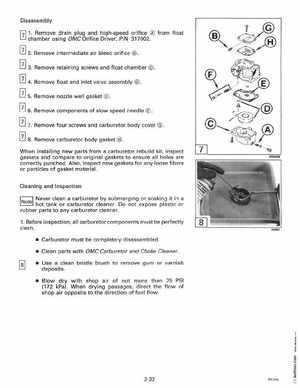
Disassembly 1Remove drain plug and high-speed orifice from float chamber using OMC Orifice Driver, PIN 317002 o o
2Remove intermediate air bleed orifice Remove retaining screws and float chamber
0 4Remove float and inlet valve assembly 5Remove nozzle well gasket
0 6Remove components of slow speed needle
Remove four screws and carburetor body cover
0 8Remove carburetor body gasket When installing new parts from carburetor rebuild kit, inspect gaskets and compare to original gaskets to ensure all holes are correctly punchedAlso, inspect new gaskets for any loose fibers or particles of gasket materialCleaning and Inspection Never clean carburetor by submerging or soaking it in hot tank or carburetor cleanerDo not expose plastic or rubber parts to any carburetor cleaner1Before inspection, all carburetor components must be perfectly clean Carburetor must be completely disassembled Clean parts with OMC Carburetor and Choke Cleaner Use clean bristle brush to remove gum or varnish deposits Blow dry with shop air of not more than 25 PSI (172 kPa)When drying passages, direct the flow of shop air opposite to the direction of fuel flow