1993 Johnson Evinrude "ET" 60 degrees LV Service Manual, P/N 508286, Page 35Get this manual
Synchronization and Linkage Adjustments It is important that this step-by-step procedure be followed in sequence and be performed exactly as written to ensure consistent engine idling and smooth operation throughout the RPM rangeRemove the throttle cable from the throttle control arm and the cable trunnion pocket before beginning this procedureTiming Pointer
i spark plug leadsRemove the spark plugs
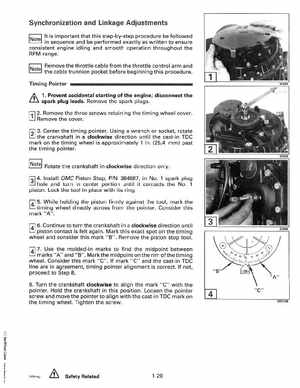
'" 1Prevent accidental starting of the engine; disconnect the 2Remove the three screws retaining the timing wheel coverRemove the cover3Center the timing pointerUsing wrench or socket, rotate
t=I the crankshaft in clockwise direction until the cast-in TOC
mark on the timing wheel is approximately in(25,4 mm) past the timing pointer
INotel Rotate the crankshaft in clockwise direction only1al 4Install OMC Piston Stop, PIN 384887, in No.1 spark plug hole and turn in center portion until it contacts the No1 pistonLock the tool in place with its ring5While holding the piston firmly against the tool, mark the timing wheel directly across from the pointerConsider this mark "A" 6Continue to turn the crankshaft in clockwise direction until piston contact is felt againMark this exact spot on the timing wheel and consider this mark "8" Remove the piston stop tool7Use the molded-in marks to find the midpoint between marks "A" and "8"Mark the midpoint on the rim ofthe timing wheelConsider this mark "C"If mark "c" and the cast-in TOC line are in agreement, timing pointer alignment is correctIf not, proceed to Step 88Turn the crankshaft clockwise to align the mark "c" with the pointerHold the crankshaft in this positionLoosen the pointer screw and move the pointer to align with the cast-in TOC mark on the timing wheelTighten the screw