1992 Johnson Evinrude "EN" 9.9 thru 30 Service Manual, P/N 508142, Page 64Get this manual
Housing and Fuel Gauge
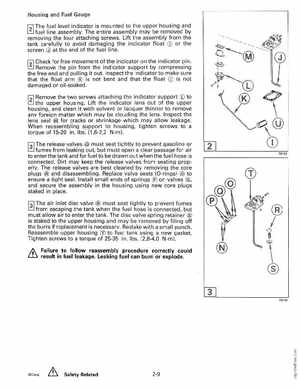
121 The fuel level indicator is mounted to the upper housing and
t=! fuel line assemblyThe entire assembly may be removed by
removing the four attaching screwsLift the assembly from the tank carefully to avoid damaging the indicator float CD or the screen Q) at the end of the fuel line
121 Check for free movement of the indicator on the indicator pin
t=! Remove the pin from the indicator support by compressing the free end and pulling it outInspect the indicator to make sure that the float arm is not bent and that the float CD is not damaged or oil-soakedt=! the upper housingLift the indicator lens out of the upper
housing, and clean it with solvent or lacquer thinner to remove any foreign matter which may be clouding the lensInspect the lens seal for cracks or shrinkage which may allow leakageWhen reassembling support to housing, tighten screws to torque of 15-20 inIbs: (1,6-2,2 Nm)fumes from leaking out, but must open clear passage for air to enter the tank and for fuel to be drawn out when the fuel hose is connectedDirt may keep the release valves from seating properlyThe release valves are best cleaned by removing the core plugs and disassemblingReplace valve seats (O-rings) to ensure tight sealInstall small ends of springs on valvesand secure the assembly in the housing using new core plugs staked in placefrom escaping the tank when the fuel hose is connected, but must allow air to enter the tankThe disc valve spring retainer is staked to the upper housing and may be removed by filing off the burrs if replacement is necessaryRestake with small punchReassemble upper housing CD to fuel tank using new gasketTighten screws to torque of 25-35 inIbs(2,8-4,0 Nm)