1990 Johnson Evinrude 120 thru 140, 185 thru 225, 300 HP, P/N 507875, Page 192Get this manual
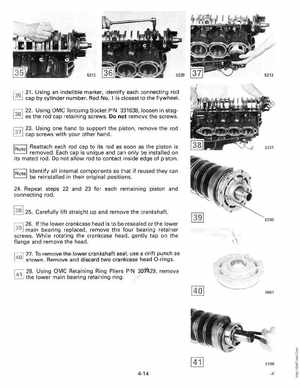
351 21Using an indelible marker, identify each connecting rod cap by cylinder numberRod No.1 is closest to the flywheel136 22Using OMC Torquing Socket PIN 331638, loosen in stages the rod cap retaining screwsDo not remove the screws1371 23Using one hand to support the piston, remove the rod cap screws with your other hand!Note! Reattach each rod cap to its rod as soon as the piston is removedEach cap is unique and can only be installed on its mated rodDo not allow rod to contact inside edge of piston!Note!ldentify all internal components so that if reused they can be reinstalled in their original positions24Repeat steps 22 and 23 for each remaining piston and connecting rod1381 25Carefully lift straight up and remove the crankshaft1391 26If the lower crankcase head is to be resealed or the lower main bearing replaced, remove the four bearing retainer screwsWhile rotating the crankcase head, gently tap on the flange and remove the head1401 27To remove the lower crankshaft seal, use drift punch as shownRemove and discard two crankcase head O-rings1411 28Using OMC Retaining Ring Pliers PIN 30,' 29, remove the lower main bearing retaining ring5230