1988 Johnson/Evinrude "CC" 40 thru 55 Models Service Manual, Page 117Get this manual
Assembly 1Place leaf valves on leaf plateIf new valves do not seat on leaf plate, turn the leaf valves over rN=t=l
Used leaf valves must not be turned over for reuse Leaf valve may break when returned to service, causing serious powerhead damage2If any leaf valves are standing open, apply light pressure using pencil eraserIf leaf valve closes with light pressure, valve is acceptableIf not, inspect leaf plate for high spots or burrs
Do not lap leaf plates in figure pattern on lapping blockIf plate is too smooth, the leaf valves may stick closed after off-season storage
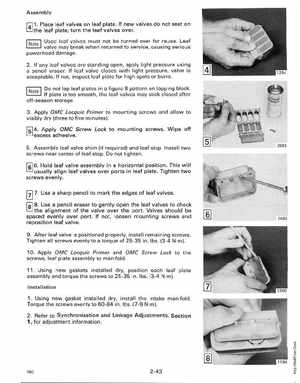
3Apply OMC Locquic Primer to mounting screws and allow to visibly dry (three to five minutes)1sl 4Apply OMC Screw Lock to mounting screwsWipe off adhesive5Assemble leaf valve shim (if required) and leaf stop Install two screws near center of leaf stopDo not tighten !sl 6Hold leaf valve assembly in horizontal positionThis will usually align leaf valves over po rts in leaf plateTighten two screws evenlyUse sharp pencil to mark the edges of leaf valvesf"8l 8Use pencil eraser to gently open the leaf valves to check the alignment of the valve over the portValves should be spaced evenly over portIf not, loosen mounting screws and reposition leaf valve9After leaf valve is positioned properly, install remaining screwsTighten all screws evenly to torque of 25 -35 in Ibs(3-4 Nm)10Apply OMC Locquic Primer and OMC Screw Lock to the screws, leaf plate assembly to manifold11 Using new gaskets installed dry, position each leaf plate assembly and torque the screws to 25-35 inIbs(3-4 Nm)Installation 1Using new gasket installed dry, install the intake manifold, Torque the screws evenly to 60-84 inIbs(7 -9 Nm)2Refer to Synchronizat ion and Linkage Adjustments, Section 1, for adjustment information