1988 "CC" Colt / Junior thru 8 Models Service Manual, P/N 507659, Page 195Get this manual
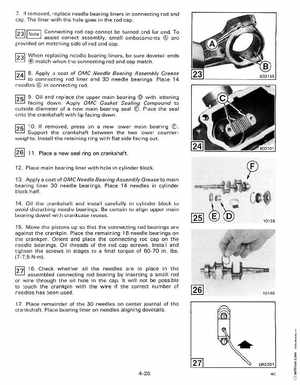
7If removed, replace needle bearing liners in connecting rod and capThe liner with the hole goes in the rod cap 12311 Note 1231 1241 251
rod cap cannot be turned end for endTo assist correct assembly, small embossments are provided on matching side of rod and capWhen replacing needle bearing liners, be sure dovetail ends match when the connecting rod and cap match
8Apply coat of OMC Needle Bearing Assembly Grease to connecting rod liner and 30 needle bearingsPlace 14 needles in connecting rod
9Oil and replace the upper main bearing with lettering facing down Apply OMC Gasket Sealing Compound to outside diameter of new main bearing seal Place the seal ont the crankshaft with lip facing down
125110If 1261
removed, press on new lower main bearing Support the crankshaft between the two lower counter weights Install the retaining ring with flat side facing out11 Place new seal ring on crankshaft
12Place main bearing liner with hole in cylinder block13Applya coat of OMC Needle Bearing Assembly Grease to main bearing liner 30 needle bearingsPlace 14 needles in cylinder block half14Oil the crankshaft and install carefully in cylinder block to avo id disturbing needle bearingsBe certain to align upper main bearing dowel with crankcase recess15Move the pistons up so that the connecting rod bearings are aga inst the crankpin Place the remaining 16 needle bearings on th crankpin Orient and place the connecting rod cap on the need le bearingsOil threads of the rod cap screwsInstall and ti ghten the screws in stages to final torque of 60-70 inIbs(7-7, Nm)