1987 Johnson/Evinrude CU Outboards 35A thru 55 Service Manual, Page 139Get this manual
Armature Plate ServicingAll Models Removal of Armature Plate
1Avoid accidental starting of motorDisconnect the fivewire connector between the armature plate and power
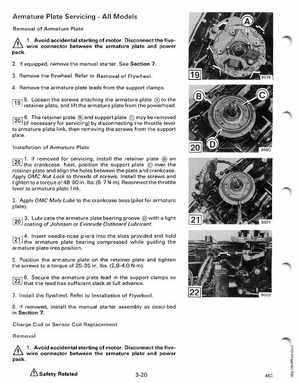
2If equipped, remove the manual starterSee Section 73Remove the flywheelRefer to Removal of Flywheel4Remove the armature plate leads from the support clamps r:tnl 5Loosen the screws attaching the armature plate
L!!.J retainer plate, and lift the armature plate from the powerheadIIiil 6The retainer plate and support plate may be removed (if necessary for servicing) by disconnecting the throttle lever to armature plate link, then removing the screws from the support plate
Installation of Armature Plate the crankcaseNext, position the support plate over the retainer plate and align the holes between the plate and crankcaseApply OMC Nut Lock to threads of screwsInstall the screws and tighten to torque of 48-60 inIbs(5-7 Nm)Reconnect the throttle lever to armature plate link2Apply OMC Moly Lube to the crankcase boss (pilot for armature plate)