1985 OMC 65, 100 and 155 HP Models Commercial Service Manual, PN 507450-D, Page 202Get this manual
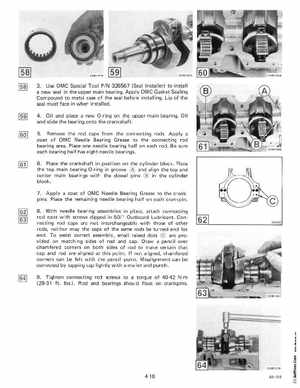
3Use OMC Special Tool PIN 326567 (Seal Installer) to install new seal in the upper main bearingApply OMC Gasket Sealing Compound to metal case of the seal before installingLip of the seal must face in when installed4Oil and place new O-ring on the upper main bearingOil and sl ide the bearing onto the crankshaft5Remove the rod caps from the connecting rodsApply coat of OMC Needle Bearing Grease to the connecting rod bearing areaPlace one needle bearing half on each rod Be sure each bearing half has eight needle bearings6Place the crankshaft in position on the cylinder blockPlace the top main bearing O-ring in groove and align the top and center main bearings with the dowel pins in the cylinder block7Apply coat of OMC Needle Bearing Grease to the crank pinsPlace the remaining needle bearing half on each crankpin 8With needle bearing assemblies in place, attach connecting rod caps with screws dipped in 501 Outboard LubricantConnecting rod caps are not interchangeable with those of other rods, neither may the caps of the same rods be turned end for endTo assist correct assembly, small raised dots are provided on matching sides of rod and capDraw pencil over chamfered corners on both sides of rod to make certain that cap and rod are aligned at this pointIf not alignedchamfered corners can be felt with the pencil pointMisalignment can be corrected by tapping cap lightly with mallet and punch9Tighten connecting rod screws to torque of 40-42 Nm (29-31 ftIbsRod and bearings should float on crankpins 62