1979 Evinrude 4 HP Outboards Service Manual, PN 5424, Page 46Get this manual
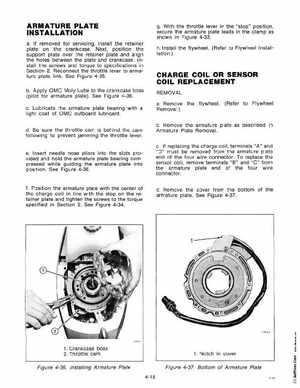
ARMATURE PLATE INSTALLATION aIf removed for servicing, install the retainer plate on the crankcaseNext, position the support plate over the retainer plate and align the holes between the plate and crankcaseInstall the screws and torque to specifications in Section 2Reconnect the throttle lever to armature plate linkSee Figure 4-35bApply OMC Moly Lube to the crankcase boss (pilot for armature plate) See Figure 4-36cLubricate the armature plate bearing with light coat of OMC outboard lubricantdBe sure the throttle cam is behind the cam following to prevent jamming the throttle lever
gWith the throttle lever in the "stop" position, secure the armature plate leads in the clamp as shown in Figure 4-33hInstall the flywheel(Refer to Flywheel Installation
CHARGE COIL OR SENSOR COIL REPLACEMENT
REMOVAL aRemove the flywheelRemoval (Refer to Flywheel
bRemove the armature plate as described in Armature Plate RemovalcIf replacing the charge coil, terminals "A" and "D" must be removed from the armature plate end of the four wire connectorTo replace the sensor coil, remove terminals "B" and "c" from the armature plate end of the four wire connectordRemove the cover from the bottom of the armature plateSee Figure 4-37