1978 Johnson 175, 200, 235 HP Outboard Service Manual, Page 185Get this manual
1End cap, trim piston and cylinder sleeve 2Trim cylinder cavity 83332
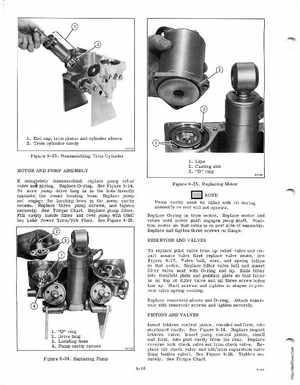
Figure 9-23Reassembling Trim Cylinder MOTOR AND PUMP ASSEMBLY
If completely disassembled, replace pump relief valve anspringReplace a-ringSee Figure 9-24Be sur pump drive tang is in the hole directly opposite the round locating bossReplace pump and en age the locating bCl!':s in thppump cavity cessReplace three pump screws, and tighten .securely See Torque ChartReplace pump filterFill cav,tty inside filter and over pump with OMC Sea Lube Power TrimTilt FluidSee Figure 9-25
1Lips 2Casting slot 3"0" ring Figure 9-25Replacing Motor NOTE
Pump cavity must be filled with oil during assembly or unit will not operate Replace a-ring on trim motorReplace motor and rotate until motor shaft engages pump shaftPosition motor so that cable is on port side of assemblyReplace and tighten three screws on flangeRESERVOIR AND VALVES To replace pilot valve trim up relief valve and impact sensor valve first replace valve seatsSee Figure 9-17Valve ball, core, and spring follow in that orderReplace filter valve ball and insert filter valve seat with a-ring end upSlide filter into manifold plate and position plate so that filter is on top of filter valve and all three screw holes line upStart screws and tighten in stages to prevent valve spring cockingReplace reservoir sleeve and a-ringAttach reservoir with reservoir screws and tighten securelyPISTONS AND VALVES Insert letdown control piston, rounded end first, into starboard cavitySee Figure 9-14Replace impact letdown valveInsert pump control piston, small end firstinto port cavity from the rearReplace reverse lock check valve and trim check valveReplace tilt check valve and tilttrim separation valve (long bodies valve)See Figure 9-26Tighten securelySee Torque Chart9-16