1978 Johnson 175, 200, 235 HP Outboard Service Manual, Page 39Get this manual
To check operation of the valve remove cap assembly from tank and wash cap in hot waterThen with vent valve opened, blow from outside to tank sideAir should flow freelyNext tighten valve and blow againNo air should flowIf either step failscap assembly should be replacedHOSE AND PRIMER BULB ASSEMBLY (See Figure 3-41) CLAMPS To disassemble hose clamps, grip clamp with pliersBend overlapping hook backward (in direction of arrow) to release clampSee Figure 3-42 CONNECTOR HOUSING
If "0" ring in connector housing is damaged, it will
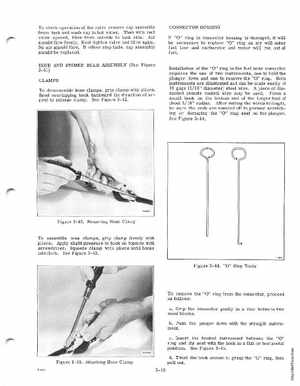
be necessary to replace "0" ring as air will enter fuel line and carburetor and motor will run out of fuelInstallation of the "0" ring in the fuel hose connector requires the use of two instruments, one to hold the plunger down and one to remove the "0" ringBoth instruments are illustrated and can be made easily of 16 gage (116" diameter) steel wireA piece of discarded remote control wire may be usedForm small hook on the bottom end of the longer tool of about 116" radiusAfter cutting the wires to length, be sure the ends are rounded off to prevent scratching or damaging the "0" ring seat on the plungerSee Figure 3-44