1976 Johnson 2HP 2R76 Outboard Motor Service Manual, Page 39Get this manual
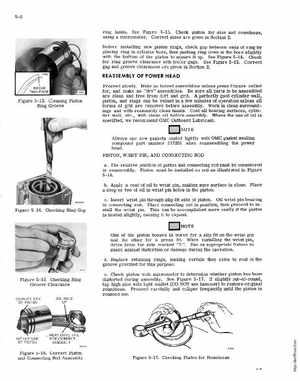
5-6 ring landsSee Figure 5-13Check piston for size and roundness, using micrometerCorrect sizes are given in Section 2Before installing new piston rings, check gap between ends of ring by placing ring in cylinder bore, then pushing ring down in the bore slightly with the bottom of the piston to square it upSee Figure 5-14Check for ring groove clearance with feeler gageSee Figure 5-15Correct gap and groove clearances are given in Section 2 REASSEMBLY OF POWER HEAD
Proceed slowlyMake no forced assemblies unless press fits are called for, and make no "dry" assembliesBe sure allllarts to be assembled are clean and free from dirt and gritA perfectly good cylinder wall, piston, and rings can be ruined in few minutes of operation unless all forms of grit are removed before assemblyWork in clean surroundings and with reasonably clean handsCoat all bearing surfaces, cylinder wall, etc with clean oil before assemblyWhere the use of oil is specified, we recommend OMC Outboard LubricantIEl,lINOTE Al ways use new gaskets coated lightly with OMC gasket sealing compound part number 317201 when reassembling the power headPISTON, WRIST PIN, AND CONNECTING ROD aThe relative pOSition of piston and connecting rod must be considered in reassemblyPiston must be installed on rod as illustrated in Figure 5-16bApply coat of oil to wrist pin, making sure surface is cleanPlace drop or two of oil in wrist pin holes in the pistoncInsert wrist pin through slip fit side of pistonOil wrist pin bearing in connecting rodPlace connecting rod in pOSition, then proceed to install the wrist pinThis can be accomplished more easily if the piston is heated slightly, causing it to expandIn lNOTE