1976 Evinrude 200 HP Outboards Service Manual, PN 5199, Page 30Get this manual
bDrill 18 inch hole through the center of the core plug to depth of not more than 116 inch below its surfaceWith punch carefully pry out the core plugSee Figure 3-20
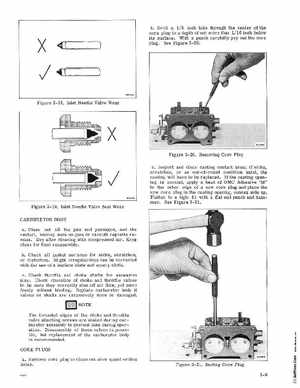
Figure 3-18Inlet Needle Valve Wear
Figure 3- 20Removing Core Plug cInspect and clean casting contact area; if nicks, scratches, or an out-of-round condition exist, the casting will have to be replacedIf the casting opening is normal, apply bead of OMC Adhesive "M" to the outer edge of new core plug and place the new core plug in the casting opening, convex side upFlatten to tight fit with flat end punch and hammerSee Figure 3-2163324
Figure 3-19Inlet Needle Valve Seat Wear CARBURETOR BODY aClean out all the jets and passages, and the venturi, making sure no gum or varnish deposits remainDry after cleaning with compressed airKeep clean for final reassemblybCheck all gasket surfaces for nicks, scratches, or distortionSlight irregularities can be corrected with the use of surface plate and emery clothcCheck throttle and choke shafts for excessive playCheck operation of choke and throttle valves to be sure they correctly shut off air flow, yet move freely without bindingReplace carburetor body if valves or shafts are excessively worn or damagedNOTE The threaded edges of the choke and throttle valve attaching screws are staked during carburetor assembly to prevent loss during operationDisassembly of these valves is possible, but replacement of the carburetor body is recommendedCORE PLUGS aRemove core plug to clean out slow speed orifice holesV66