1974 Johnson 40 HP Outboard Motors Service manual, Page 69Get this manual
in position on wiv el bracketPlace tee ring bracket in position in swivel bracketSee Figure 6-22If removed, reinstall throttle control gear bushing, gear, shaft, and pinion to steering bracketcIf removed, attach rubber mounts to exhaust tube assembly, and attach uppe front mount to st eering bracketPlace exhaust tube assembly, with shirt rod and water tube installed, in position on steering bracketdAttac upper side mounts to steering bracket with nuts and washersReplace lower side mount housings Replace nut and washer at upper front mounteReplace lower motor cover bracketOval head screw must be tightened firstInstall power head plate and lower motor cove r, using new gaSketsAttach motor cover with nuts and lockwashersInstall power head as described in Section 5 REFERENCE PICTURE
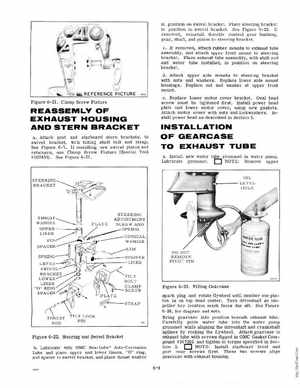
Figure 6- 21Cla mp Screw Fixture
REASSEMLY OF EXHAUST HOUSING AND STERN BRACKET
a Attach port and starboard tern brackets, to swivel bracket, with tilting haft bolt and strapSee Figure 6-7If installing new swivel plates and retainers, use Clamp Screw Fixture (Special Tool 11302435)See Figure 6-21