1971 Johnson 60HP outboards Service Manual, Page 75Get this manual
7-5 cRemove drive end head, taking care to avoid damaging bearing in headdRemove commutator head by tapping lightly with rubber malletRemove brushes and spring from holderLift armature from frame and field assemblySee Figure 7-4 CLEANING, INSPECTION AND REPAIR
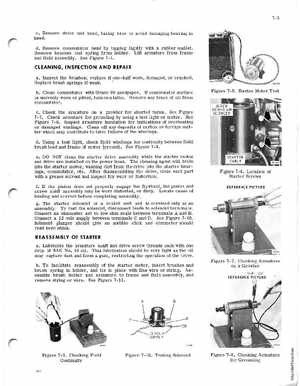
aInspect the brushes; replace if one-half worn, damaged, or crackedReplace brush springs if weak' bClean commutator with Grade 00 sandpaperIf commutator surface is unevenly worn or pitted, turn on latheRemove any trace of oil from commutatorcCheck the armature on growler for shorted turnsSee Figure 7-7Check armature for grounding by using test light or meterSee Figure 7-8Inspect armature insulation for indications of overheating or damaged windingsClean off any deposits of carbon or foreign matter which may contribute to later failure of the windingsdUsing test light, check field windings for continuity between field brush lead and frame of motor (ground)See Figure 7-9eDO NOT clean the starter drive assembly while the starter motor and drive are installed on the power headThe cleaning agent will drain into the starter motor, washing dirt from the drive into the starter bearings, commutator, etcAfter disassembling the drive, clean each part with grease solvent and inspect for wear or distortionfIf the pinion does not properly engage the flywheel, the pinion and screw shaft assembly may be worn distorted, or dirtyLocate cause of binding and correct before completing assemblygThe starter solenoid is sealed unit and is serviced only as an assemblyTo test the solenoid, disconnect leads to solenoid terminalsConnect an ohmmeter set to low ohm scale between terminals and BConnect 12 volt supply between terminals and DSee Figure 7-10Solenoid plunger should give an audible click and ohmmeter should read zero ohms