1971 Johnson 2HP outboards Service Manual, Page 34Get this manual
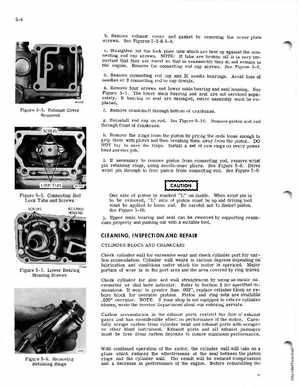
bRemove exhaust cover and gasket by removing the cover plate screwsSee Figures 5-55-4cStraighten out the lock plate tabs which are bent up against the connecting rod cap screwsNOTE: If tabs are broken off it is very important that they are found so that in reassembly they do not remain in the engineRemove the connecting rod cap screwsSee Figure 5-6dRemove connecting rod cap and 30 needle bearingsAvoid loss of needles or connecting rod to cap dowelse: Remove four screws and lower main bearing and seal housingSee FIgure 5-7The lower main bearing and seal are not serviced separatelyIf bearing or seal are damaged, entire assembly must be replacedFigure 5-5Exhaust Cover Removed
fRemove crankshaft through bottom of crankcase
gReinstall rod cap on rodSee Figure 5-16Remove piston and rod through front of crankcasehRemove the rings from the piston by prying the ends loose enough to grip them with pliers and then breaking them away from the pistonDO NOT try to save the ringsInstall set of new rings on every power head service jobiIf necessary to remove piston from connecting rod, remove wrist pin retaining rings, using needle-nose pliersSee Figure 5-8Drive wrist pin through to free piston from connecting rodSee Figure 5-9