Honda B75K2-B75K3 Outboard Motors Manual., Page 10Get this manual
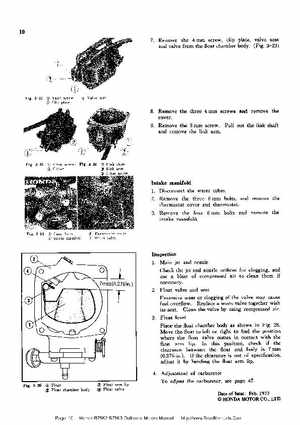
7Remove the mm screw, clip plate, valve seat and valve from the float chamber body(Fig3-23)
8Remove the three mm screws and remove the cover
9Remove the mm screwPull out the link shaft
and remove the link arm
Intake manifold
1Disconnect the water tubes2Remove the three mm bolts, and remove the thermostat cover and thermostat
3Remove the four mm bolts and remove the intake manifold
Inspection
Main jet and nozzle Check the jet and nozzle orifices for clogging, and use blast of compressed air to clean them if necessaryFloat valve and seat Excessive wear or clogging of the valve may cause fuel overflowReplace worn valve together with its seatClean the valve by using compressed airFloat level Place the float chamber body as shown in Fig26Move the float to left or right to find the position where the float valve comes in contact with the float arm lipIn this position, check if the clearance between the float and body is (0.276 inIf the clearance is out of specification, adjust it by bending the float arm lipAdjustment of carburetor adjust the carburetor, see page 47Date of Issue: Feb1977 HONDA MOTOR CO LTDPage: 10Honda B75K2-B75K3 Outboard Motors Manual -