Chrysler 75 and 85 HP Outboards Service Manual OB 3646, Page 184Get this manual
NOTE The O-ring seals have different diametersThe smaller diameter seal goes on the forward end of the spool and the larger one on the rear of spoolFigure 39All O-ring seals should always be replaced when rebuilding the lower units
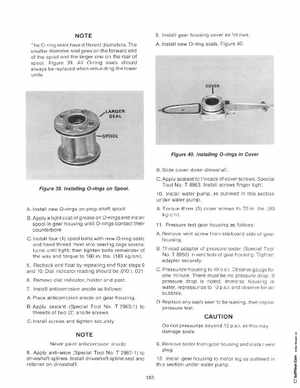
9Install gear housing cover as follows AInstall new O-ring sealsFigure 40
Figure 40Installing O-rings in Cover
BSlide cover down driveshaftC Apply sealant to threads of cover screwsSpecial Tool NoT 8983 Install screws finger tight10Install water pump, as outlined in this section under water pump AInstall new O-rings on prop shaft spoolBApply light coat of grease on O-rings and install spool in gear housing until O-rings contact their counterboreC.lnstall four (4) spool bolts with new O-ring seals and hand thread them into bearing cage several turns until tight; then tighten bolts remainder of the way and torque to 160 inIbs(183 kgcm) 5Recheck end float by repeating end float steps and 10Dial indicator reading should be .010 .001 6Remove dial indicator, holder and post 7Install anticorrosion anode as follows: APlace anticorrosion anode on gear housing BApply sealant (Special Tool No 2963-1) to threads of two (2) anode screwsC.lnstall screws and tighten securely ATorque three (3) cover screws to 70 inIbs (80 kgcm) 11Pressure test gear housing as follows: ARemove vent screw from starboard side of gear housingBThread adapter of pressure tester (Special Tool No 8950) in vent hole of gear housing Tighten adapter securelyC Pressurize housing to 10 p.s.i Observe gauge for one minuteThere must be no pressure dropIf pressure drop is notedimmerse housing in water, repressuriz to 10 p.s.iand observe for ai bubblesDReplace any seals seen to be leakingthen repeat pressure test