2002 Bombardier Quest 650XT Service Manual, Page 141Get this manual
Section 03 ENGINE Subsection 10 (GEARBOX)
Assembly
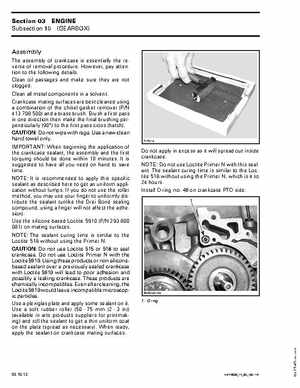
The assembly of crankcase is essentially the reverse of removal procedureHowever, pay attention to the following detailsClean oil passages and make sure they are not cloggedClean all metal components in solventCrankcase mating surfaces are best cleaned using combination of the chisel gasket remover (PN 413 708 500) and brass brushBrush first pass in one direction then make the final brushing perpendicularly (90) to the first pass cross (hatch)CAUTION: Do not wipe with ragsUse new clean hand towel onlyIMPORTANT: When beginning the application of the crankcase sealant, the assembly and the first torquing should be done within 10 minutesIt is suggested to have all you need on hand to save timeNOTE: It is recommended to apply this specific sealant as described here to get an uniform application without lumpsIf you do not use the roller method, you may use your finger to uniformly distribute the sealant (unlike the Drei Bond sealing compound, using finger will not affect the adhesion)Use the silicone-based Loctite 5910 (PN 293 800 081) on mating surfacesNOTE: The sealant curing time is similar to the Loctite 518 without using the Primer NCAUTION: Do not use Loctite 515 or 518 to seal crankcaseDo not use Loctite Primer with the Loctite 5910Using these products or non siliconebased sealant over previously sealed crankcase with Loctite 5910 will lead to poor adhesion and possibly leaking crankcaseThese products are chemically incompatiblesEven after cleaning, the Loctite 5910 would leave incompatible microscopic particlesUse plexiglas plate and apply some sealant on itUse soft rubber roller (5075 mm (2in)) (available in arts products suppliers for printmaking) and roll the sealant to get thin uniform coat on the plate (spread as necessary)When ready, apply the sealant on crankcase mating surfaces