2011 Arctic Cat 400 TRV ATV Service Manual, Page 139Get this manual
2Remove the torx-head cap screws securing the taillight assembly to the frameAccount for any washers3Remove the taillight assemblyINSPECTING NOTE: Whenever part is worn excessively, cracked, or damaged in any way, replacement is necessary
1Inspect wiring harness, three-prong connector, lens, base, cap screws, and socket for damage2Inspect all wires for corroding, pinching, and cracking3Inspect the bulb for wattage, voltage, and proper operationINSTALLING 1Place the assembly into position on the frame and secure with torx-head cap screws and any washers2Tighten the cap screws securely3Route the wiring harness over the rear frame; then connect the three-prong connectorCF227A
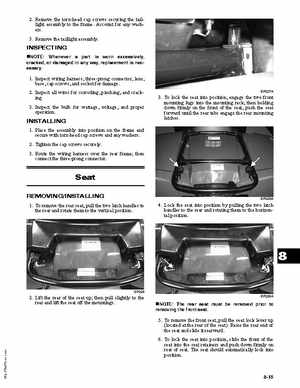
3To lock the seat into position, engage the two front mounting lugs into the mounting rack; then holding down firmly on the front of the seat, push the seat forward until the rear tabs engage the rear mounting latches