2011 Arctic Cat 400 TRV ATV Service Manual, Page 112Get this manual
3If clearance is as specified, remove the ring gear and thrust button; then place drop of red Loctite #271 on the threads and tighten to ft-lb (left-hand threads)4If clearance is not as specified, repeat steps and using thicker (clearance too great) or thinner (clearance too small) until correct specification is reachedINSTALLING 1Slide the gear case into position through the left side of the frame; then secure it to the frame with cap screws and lock nutsTighten to 38 ft-lb2Secure the engine output shaft to the rear gear case input flange with four cap screws and lock nutsTighten to 20 ft-lb3Install the rear drive axles (see Drive Axles in this section)4Install the left-side rear A-arms (see Rear A-Arms in Section 7) CLEANING AND INSPECTING
NOTE: Whenever part is worn excessively, cracked, or damaged in any way, replacement is necessary
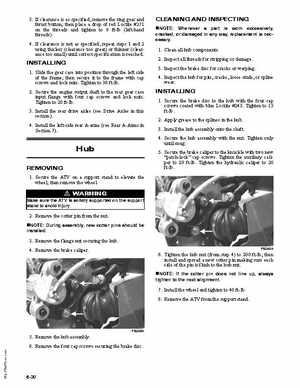
1Clean all hub components2Inspect all threads for stripping or damage3Inspect the brake disc for cracks or warping4Inspect the hub for pits, cracks, loose studs, or spline wearINSTALLING 1Secure the brake disc to the hub with the four cap screws coated with blue Loctite #243Tighten to 15 ft-lb2Apply grease to the splines in the hub3Install the hub assembly onto the shaft4Secure the hub assembly with the nutTighten only until snug5Secure the brake caliper to the knuckle with two new "patch-lock" cap screwsTighten the auxiliary caliper to 20 ft-lbTighten the hydraulic caliper to 20 ft-lb