2010 Arctic Cat Prowler XT/XTX/XTZ ATV Service Manual, Page 206Get this manual
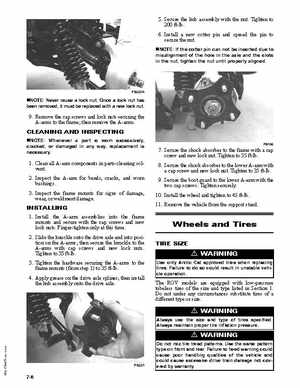
5Secure the hub assembly with the nutTighten to 200 ft-lb6Install new cotter pin and spread the pin to secure the nutNOTE: If the cotter pin can not be inserted due to misalignment of the hole in the axle and the slots in the nut, tighten the nut until properly aligned PR220A
NOTE: Never reuse lock nutOnce lock nut has been removed, it must be replaced with new lock nut
9Remove the cap screws and lock nuts securing the A-arms to the frame; then remove the A-armsCLEANING AND INSPECTING
NOTE: Whenever part is worn excessively, cracked, or damaged in any way, replacement is necessaryPR196
7Secure the shock absorber to the frame with cap screw and new lock nutTighten to 35 ft-lb8Secure the shock absorber to the lower A-arm with cap screw and new lock nutTighten to 35 ft-lb9Secure the boot guard to the lower A-arm with the two cap screwsTighten securely10Install the wheel and tighten to 45 ft-lb11Remove the vehicle from the support stand
1Clean all A-arm components in parts-cleaning solvent2Inspect the A-arm for bends, cracks, and worn bushings3Inspect the frame mounts for signs of damage, wear, or weldment damageINSTALLING 1Install the A-arm assemblies into the frame mounts and secure with the cap screws and new lock nutsFinger-tighten only at this time2Slide the knuckle onto the drive axle and into position on the A-arms; then secure the knuckle to the A-arms with cap screws and new lock nutsTighten to 35 ft-lb3Tighten the hardware securing the A-arms to the frame mounts (from step 1) to 35 ft-lb4Apply grease on the drive axle splines; then install the hub assembly onto the drive axle